This tutorial is tailored for homeowners who have an existing floor plan and are seeking to update or renovate their houses or apartments.
Step 1: Setting Up and Importing Floor Plan
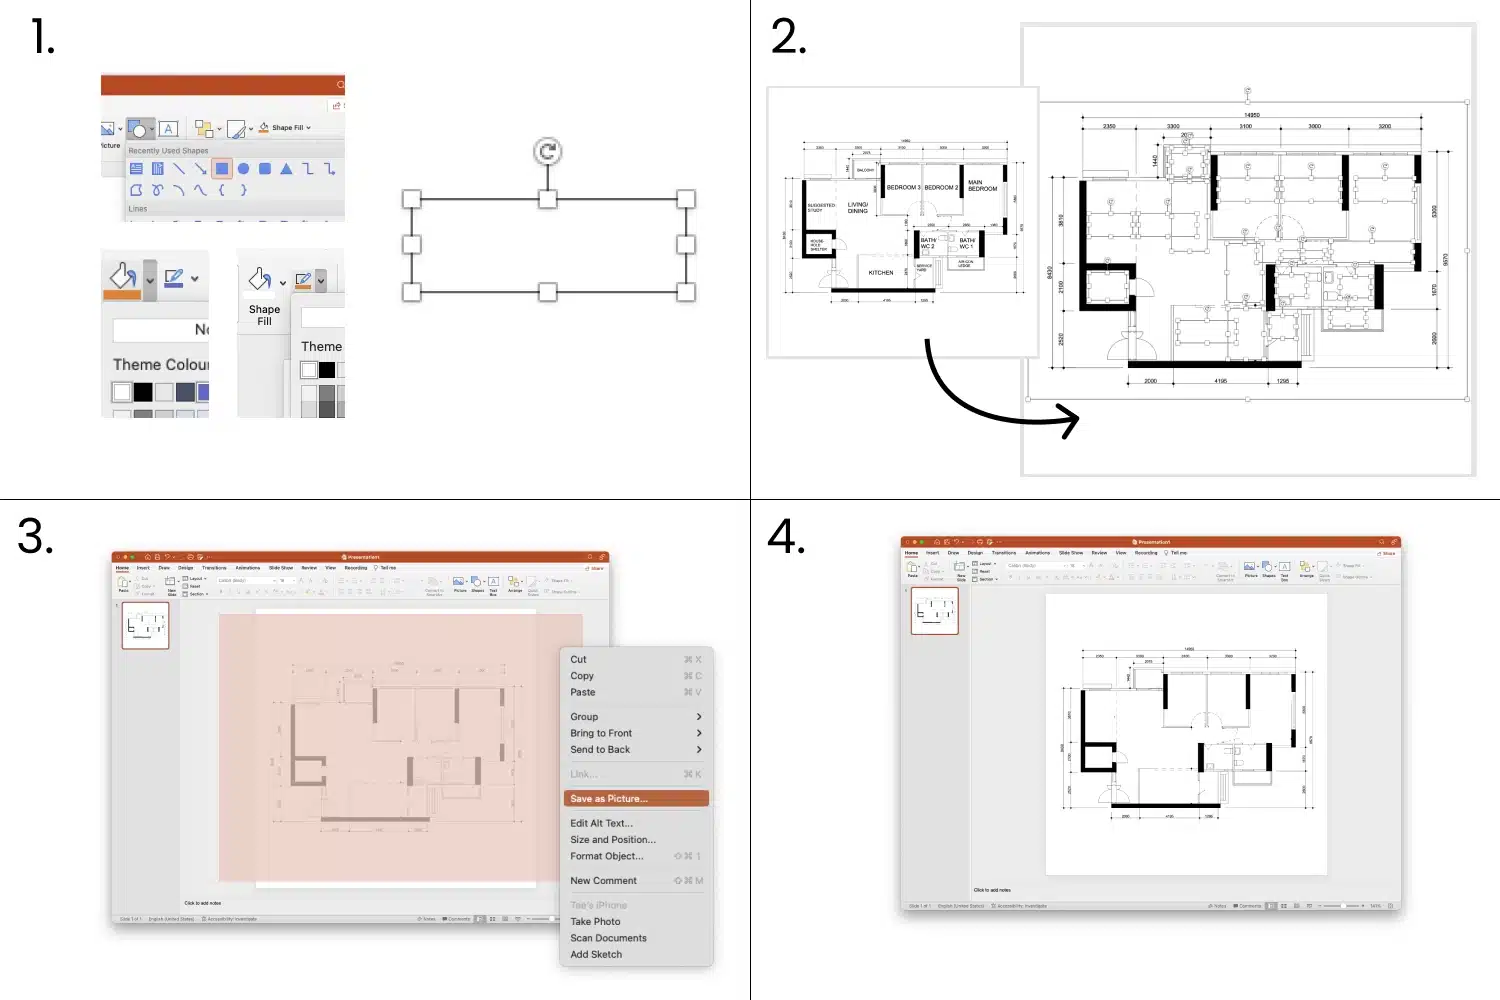
In this first step, we will begin by setting up PowerPoint and importing the floor plan into PowerPoint.
- Convert floor plan to image file format: Begin by ensuring that your floor plan is in JPEG or PNG format. If it’s in PDF, convert it to an image file format. You can easily convert the floor plan to JPEG or PNG online.
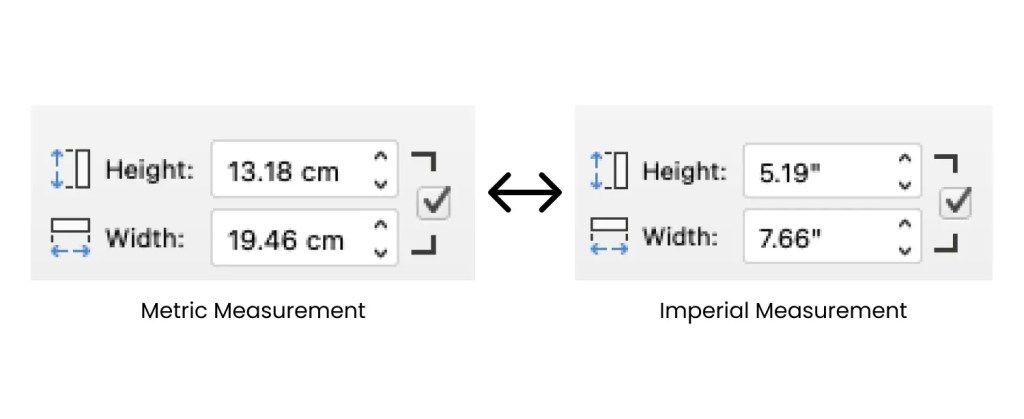
- Configuring to your preferred measurement system: Ensure your preferred measurement system is used in PowerPoint. Check the measurement system in your current setup by navigating to the Size tab (under Picture Tools and Format tab in Windows, under Picture Format tab in Mac. Make sure that you selected any picture, shapes, or text box). If the measurement system needs adjustment, modify it in the Control Panel (for Windows users) or System Preferences (for Mac users) accordingly.
- Setting up slide size: Open PowerPoint and navigate to the Design tab. Select Slide Size and adjust it to 20cm x 20cm, a suitable size for most floor plans.
- Drawing scale: We will assume that the drawing scale is 1:100, for example, 1 cm in PowerPoint equals 100 cm in the floor plan.
- Import or insert the floor plan: Insert your floor plan by clicking Insert > Pictures > Photo from File and locating your floor plan image.


Step 2: Scaling the Floor Plan
In this step, we’ll guide you through the process of accurately scaling your floor plan to 1:100 in PowerPoint. This step is crucial for ensuring that your floor plan is accurately represented in the scaled drawing. We will scale the floor plan by creating a ruler with a rectangle shape.
- Find a dimension reference on your imported floor plan: Choose a whole number dimension on your floor plan (e.g. 3000mm) as a reference.
- Creating ruler with rectangle shape: Insert a rectangle shape and adjust one side to be 3cm, representing the 3000mm at a 1:100 scale.
- Resize the floor plan to scale: Position the rectangle shape to align with the dimension reference on your floor plan. Resize the floor plan so that the 3000mm in the floor plan matches the 3cm side of rectangle shape, achieving a 1:100 scale.
- Avoid stretching the floor plan: Always use the corner handle to resize to avoid stretching the floor plan.

Step 3: Clean Up the Floor Plan
This step shows you how to remove any unnecessary elements such as dimensions, text, or furniture overlays from your floor plan. Thus allowing you to work with a clean and clutter-free floor plan.
- Create white filled shapes: Insect new rectangle shape and adjust the fill and outline color of the shape to white color.
- Cover unwanted elements with white filled shapes: Use the created white filled shapes to cover dimensions, text, or furniture overlays on the imported floor plan. Copy (Ctrl + c) and paste (Ctrl + v) to duplicate shape.
- Save as new image: Once you’ve covered the unwanted elements, save the floor plan along with the shapes as a new image file. Drag from the top right to bottom left to select all the white filled shapes and the floor plan on the Canvas. Right click and select Save as Picture…
- Reinsert the clean floor plan: Reinsert the newly saved image back into your slide. This step prevents accidental changes to your floor plan while you continue working on it.
Step 4: Designing the floor plan
This step shows you how to begin drawing furniture or walls using shapes in PowerPoint and begin designing floor plan.
- Inserting Shape to represent furniture: We can insert a rectangle shape to represent a dining table
- Adjusting shape size to represent real wall dimensions: As the drawing is scaled to 1:100, adjust the shape sizes to represent real-world dimensions accurately. For example, adjust the shape size to be 2cm x 0.8cm to represent a 200cm x 80cm dining table
- Creating Wall Partition: Insert rectangle shape to represent the wall partition
- Use Union function to join the walls: A. When you have two walls join at right angle, you can join two walls with the Union function. B. Select both walls by pressing ‘Shift’ Key. C. Select ‘Union’ under Merge Shapes button D. Two walls are successfully joined at right angle.


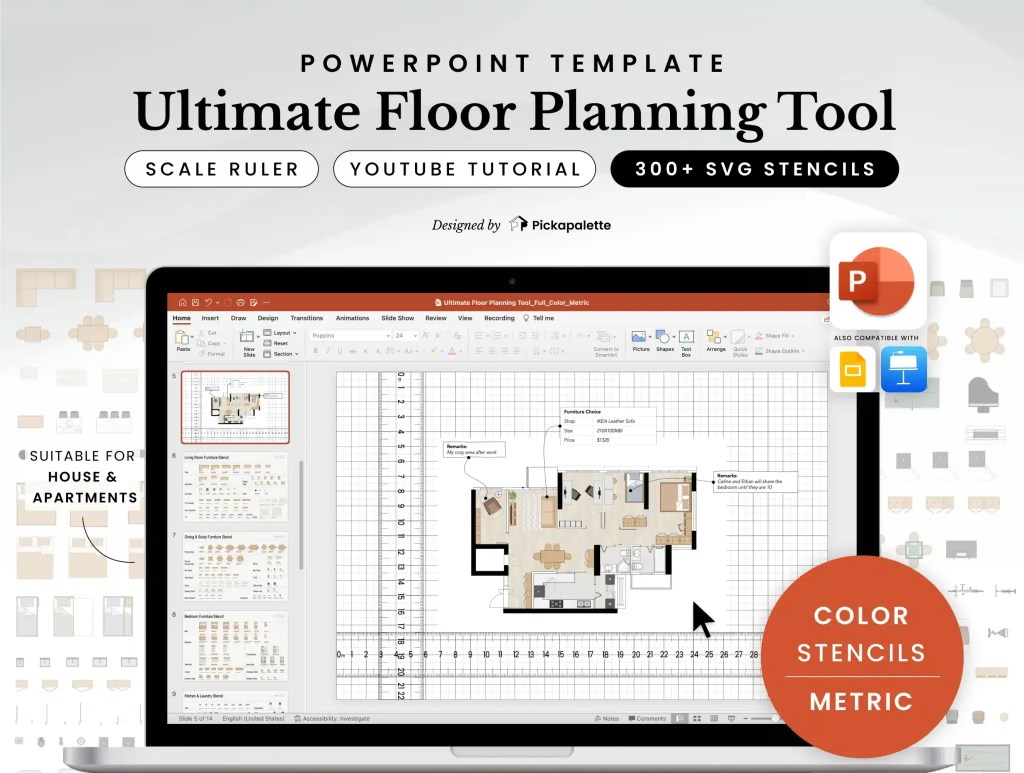
Introducing our Ultimate Floor Planning Tool

Drawing out the furniture in PowerPoint can be challenging. That’s why we’ve created the Ultimate Floor Planning Tool, available for download from our store at an affordable price. This comprehensive tool includes over 300 professionally crafted stencils for your living room, dining room, bedroom, bathroom, kitchen, study, and even a home gym. These stencils are accurately sized and imported into PowerPoint for easy use.

With this tool, you can quickly add furniture to your floor plan by copying and pasting the stencils. This saves you time and helps you get started on designing your floor plan design right away.
Additionally, the tool features a Grid canvas and Ruler, ensuring that your floor plan is accurately scaled without any confusion.
It is also compatible on Google Slide and Keynote for added flexibility.
Next, we will show you step-by-step guide on how to begin designing floor plan with our Ultimate Floor Planning Tool.
Step 1: Insert Floor Plan
To get started, simply insert your floor plan into PowerPoint by clicking Insert > Pictures > Photo from File and selecting your floor plan image.
Unlike traditional drawing apps, our tool eliminates the need for manual tracing, reducing the risk of inaccuracies, especially for non-professionals.
Step 2: Easy Scaling with Ruler
Our tool streamlines the process of scaling your floor plan. With its Canvas and Ruler features, you can simply insert your floor plan and adjust the scale using the provided ruler. This makes scaling your floor plan quick and effortless.

Step 3: Explore Design Ideas with 300+ Stencils
Save time and effort by using our tool’s library of pre-drawn furniture stencils. These stencils accurately represent furniture sizes commonly found in the market.
Now you can experiment with different layouts and furniture arrangements directly in your floor plan, allowing you to visualise how different pieces fit together before making any costly purchases.
By copying and pasting these furniture stencils into your floor plan, you can easily test various design ideas without the need for manual drawing or measurement.


Advanced Features
We recommend using PowerPoint’s Selection Pane feature, which allows you to view and arrange elements easily. All stencils are neatly named in the Selection Pane, enhancing your workflow.

Conclusion
Creating a floor plan in PowerPoint is a versatile and straightforward process that allows for easy exploration and design. Whether you’re planning your home layout or designing for clients, Ultimate Floor Planning Tool can be a valuable tool.
With the skills gained from this tutorial, we are sure you can confidently create detailed floor plans to guide your renovation or design projects in PowerPoint.
For the full tutorial, watch the 10-minute video or follow the link to learn more about the Ultimate Floor Planning tool in PowerPoint.